This is a continuation of my restoration of a Singer model 404 sewing machine I bought off Facebook Marketplace. If you want to read the first part,
click here.
Once I get all the parts off, the machine goes outside to take a shower. I scrub it inside and out with a degreasing cleaner and rinse it with the garden hose. This makes it spotlessly clean and fresh-smelling. The machine gets a blow-dry with the leaf blower and I bring it back inside and quickly grease and oil the insides before things get rusty. Now I wax!
And wax.
And wax.
Altogether, I put on 2 layers of cleaner wax and 4 layers of carnauba wax, the same stuff you'd use on your car. This sewing machine's body is cast aluminum, with nice heavy-duty steel shafts and gears. There is nothing that smells better than a clean sewing machine, the wax has a lovely "tropical" scent and even the oil & grease I use (
Tri-Flow) has a yummy banana scent.
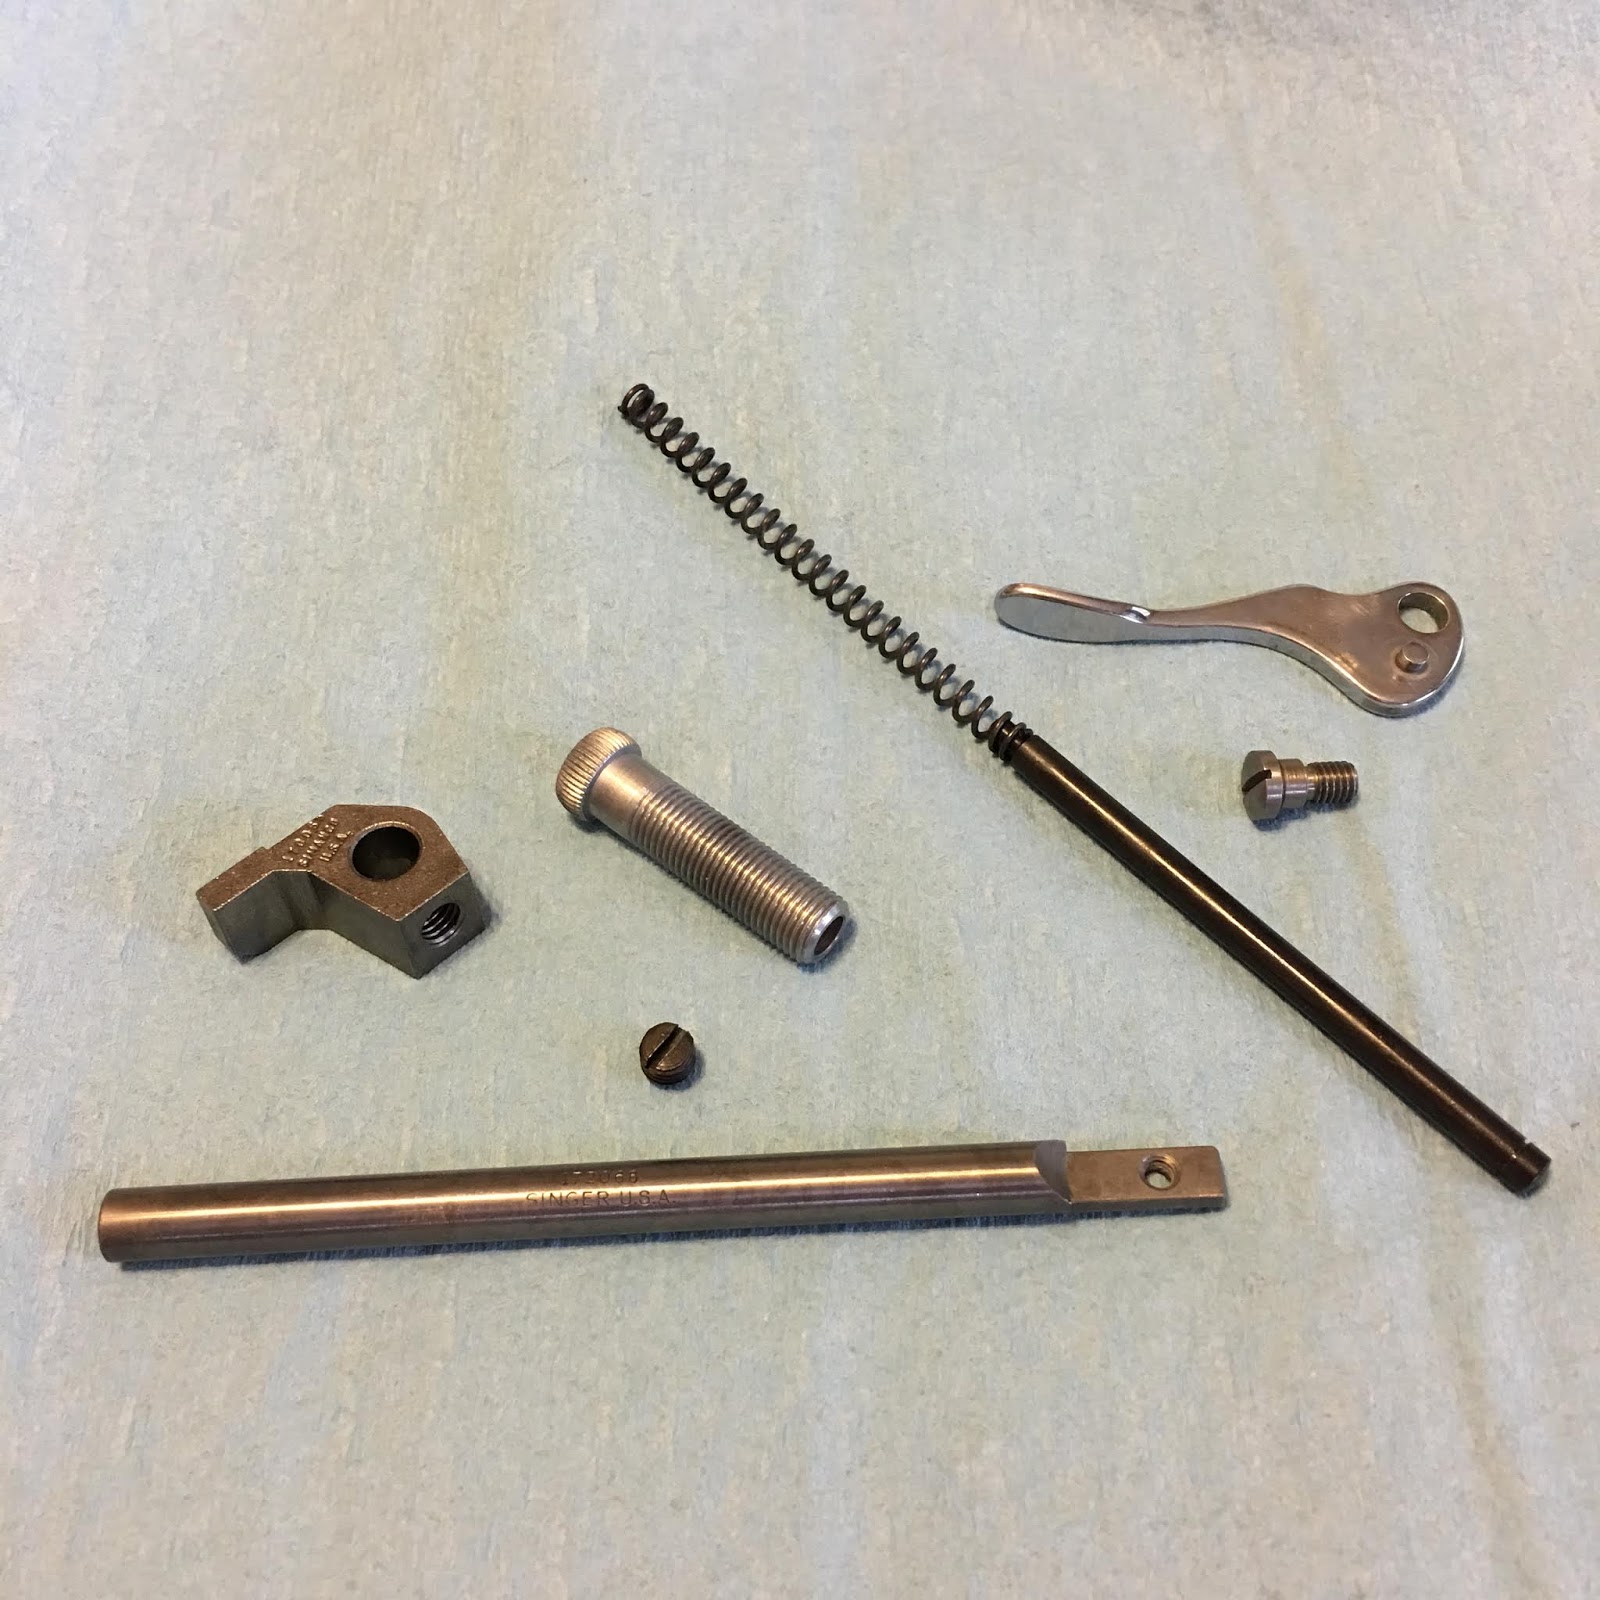
The parts I cleaned look great and I start rebuilding the machine! These are the "feed regulator" parts I had soaking in the first part. Now clean, they get brushed with Tri-Flow and installed.
These are the external feed regulator parts.
All installed on the machine!
When I take things off, each area's parts go into a different little bag. Here are the bobbin winder tension bracket parts.
You can't really leave parts off if everything is all together in a bag.
Here is an undertaking! These are the throat plate positioning parts. My parts look a little different than the ones Andy demonstrated but since he teaches you how things work I was able to put it back together. These were the parts I had such trouble removing before, now they work as smooth as butter!
All those parts above to move the two little clamping pins at the top there. Ingenious. Sheesh, remember how nasty this hook area was? That shower was really needed!
It feels better to have the thread take-up lever reinstalled.
The needlebar!
The presser bar!
Here, I am setting the presser bar to the factory height.
The rotary hook and the feed dogs.
The hook area is complete!
I reinstalled the electrics.
I must have got it right, the light came on!
15 parts in the tension assembly. They got a greasy bath in WD40 so I could remove the set screw to take it apart.
Now all nice and cleaned and the set screw safely inside its own bag. It's too teeny and I will lose it!
Now it is all installed on the machine.
I was able to fix the crushed arm top cover thread guide.
That horribly rusty stop motion clamp nut shined right up!
Doesn't it look nice now?
All the parts are on except the motor. Curious as always, I threaded up the machine and it sewed when I turned the handwheel! Now for that motor...
I started taking the motor apart. Once I had the brushes out I could see inside and was shocked to find a perfectly clean motor. What? Why is it so clean? Hardly any carbon dust, even on the commutator. Has it even been used? I'm no fool, I cleaned the outside of the motor, put the brushes back in and called it done.
I took the controller off my 404, Jake, and plugged it in this one. It sews like a champ! I, however, don't sew very well with one hand on the controller and the other holding the camera.
Now to restore this machine's controller!
Starting off, it is just as filthy as the machine was.
Stinky too, like a musty old storage shed.
The parts look great.
After cleaning and polishing the parts look even better!
The bakelite housing got washed and waxed.
When I opened the carbon resistor tubes I was pleased to find very, very clean carbons! I really think this machine was hardly ever used.
All the gazillion parts inside a button style controller. I got it put back together and adjusted. No more musty smell!
Oh, excellent! I have a great range of control and Jiminy Crickets this machine can fly! It can sew faster than I could ever keep up with.
I am so, so sad to be finished restoring this machine. It was the best fun I've had in ages. I will be putting this machine up for sale since I already own a 404.
Disclaimer:
Anyone can do this. I am
not mechanically inclined. Everything I am doing in these photos can be learned by watching
Andy Tube videos. You can do it too.
*waves to Andy*
Thank you for visiting my blog today!
xox